I still remember the summer I spent helping my grandfather in his workshop, learning the ins and outs of carpentry and DIY projects. But one thing he never taught me was how to deal with those pesky ticks that seemed to appear out of nowhere. I recall one particular incident where I had to learn about Removing a Tick Safely the hard way – after a hike, I found one of those unwanted critters attached to my arm. Let’s just say it was a painful and frustrating experience. The common myth that you need to use crazy methods like burning or suffocating the tick is not only ineffective but also dangerous.
In this article, I’ll share with you the simple truth about Removing a Tick Safely, and provide you with practical advice on how to do it correctly. You’ll learn the exact steps to take, from preparation to aftercare, and how to avoid common mistakes that can lead to further complications. My goal is to empower you with the knowledge and confidence to deal with ticks in a safe and efficient manner, so you can enjoy the great outdoors without worrying about these tiny troublemakers. By the end of this guide, you’ll be well-equipped to handle tick encounters like a pro, and I’ll even share some personal anecdotes about my trusty tools, like my favorite tweezers, Bertha, who’s been with me through thick and thin.
Table of Contents
Project Overview
Total Time: 15 minutes to 1 hour
Estimated Cost: $0 – $10
Difficulty Level: Easy
Tools Required
- Fine-tipped tweezers ((preferably with a slanted tip))
- Antiseptic wipes
Supplies & Materials
- Antibiotic ointment
- Bandage
Step-by-Step Instructions
- 1. First, let’s get prepared by gathering our trusty tools – I like to call my tweezers Tickzilla because they’re the heroes that save the day. Make sure you have a pair of fine-tipped tweezers, some antiseptic wipes, and a sealed container or a plastic bag ready. This might seem like overkill, but trust me, it’s better to be safe than sorry when dealing with ticks.
- 2. Now, before we dive into the removal process, take a deep breath and remain calm. It’s essential to approach this task with a steady hand to avoid irritating the tick, which could lead to it burying deeper into your skin. I remember my grandfather telling me stories about how his old tool, which he named “Steady Eddie,” helped him in times of precision work – it’s all about having the right mindset and tools.
- 3. Next, clean the area around the tick with an antiseptic wipe to prevent any potential infection. This step is crucial because it prepares the skin for the removal process and reduces the risk of complications. My tool, “Wipeout Wendy,” always comes in handy during this step, reminding me of the importance of cleanliness in DIY projects.
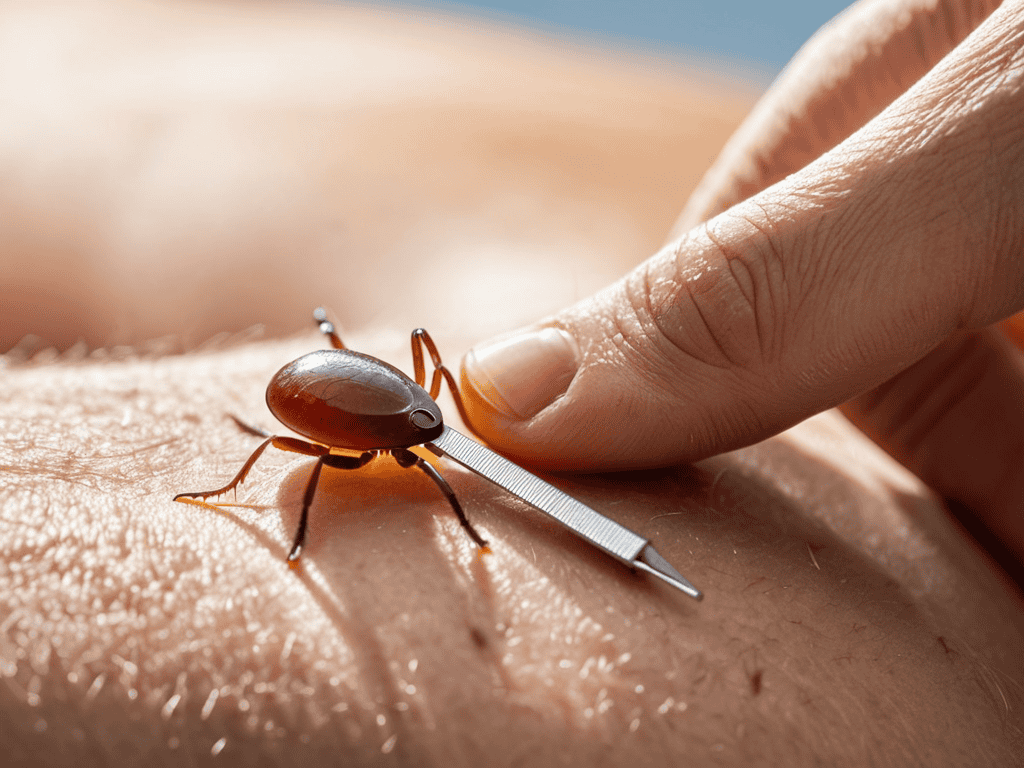
- 4. Using your Tickzilla tweezers, grasp the tick as close to your skin as possible. Be careful not to pinch or squeeze the tick’s body, as this can cause it to release more bacteria into your skin. I’ve found that if you’re gentle and patient, the process becomes much less daunting – it’s almost therapeutic, like sanding down an old wooden chair to reveal its hidden beauty.
- 5. Slowly and steadily, pull the tick upwards with a smooth, even motion. Do not jerk or twist the tick, as this can cause its mouthparts to break off and remain in your skin. If this happens, don’t panic – we’ll cover how to deal with it in the next step. Remember, it’s all about the gentle touch, much like when you’re applying a new coat of paint to a vintage dresser.
- 6. After removing the tick, use an antiseptic wipe to clean the area again and apply an antibiotic ointment to reduce the risk of infection. If any part of the tick remains in your skin, use a sterile needle or a pair of fine-tipped tweezers (yes, Tickzilla can come to the rescue again) to remove it. Be cautious and take your time – it’s a bit like carefully selecting the right screws for a repurposed furniture project.
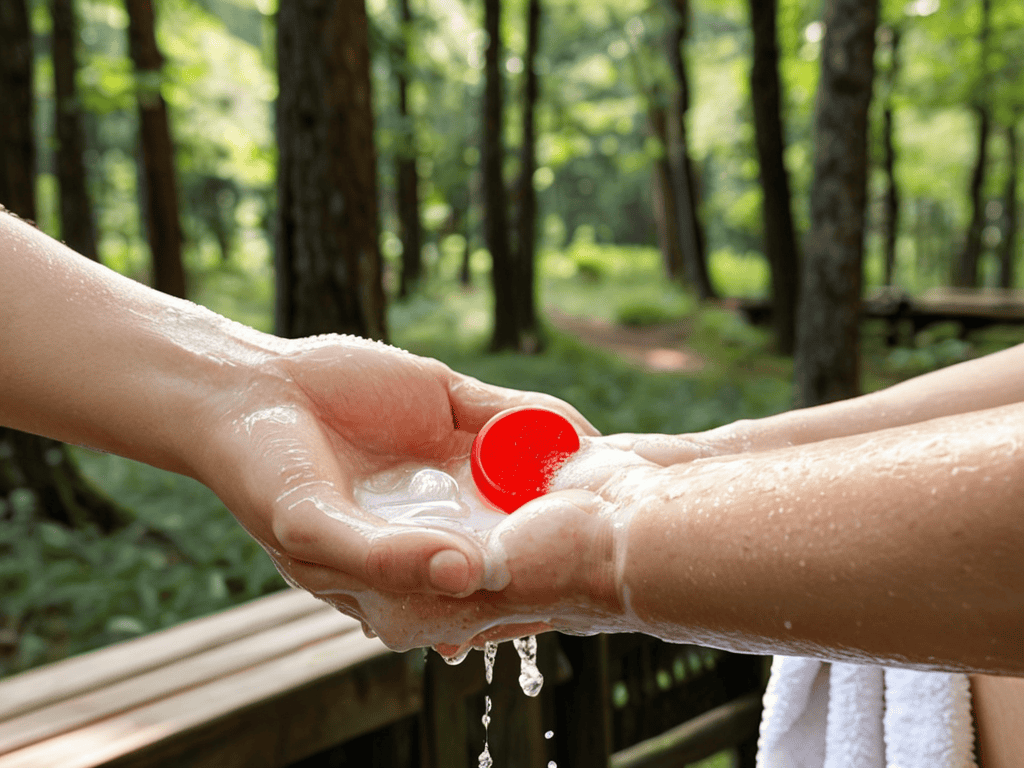
- 7. Finally, dispose of the tick by placing it in a sealed container or plastic bag and marking the date on it. This might seem like an odd step, but it’s useful for monitoring if you develop any symptoms that could be related to a tick-borne illness. Then, wash your hands thoroughly with soap and water, and take a moment to breathe a sigh of relief. You’ve successfully removed the tick, and now it’s time to give your trusty tools, like Tickzilla, a good cleaning and some rest – they’ve earned it after a job well done.
Removing a Tick Safely
When it comes to dealing with ticks, I always say that prevention is key. After safely removing a tick, it’s essential to take a few extra steps to prevent any potential health issues. This includes washing the affected area with soap and water, and applying an antiseptic to reduce the risk of infection. I also like to remind my readers to be aware of the common tick removal mistakes, such as using heat or chemicals to try and remove the tick, which can actually increase the risk of disease transmission.
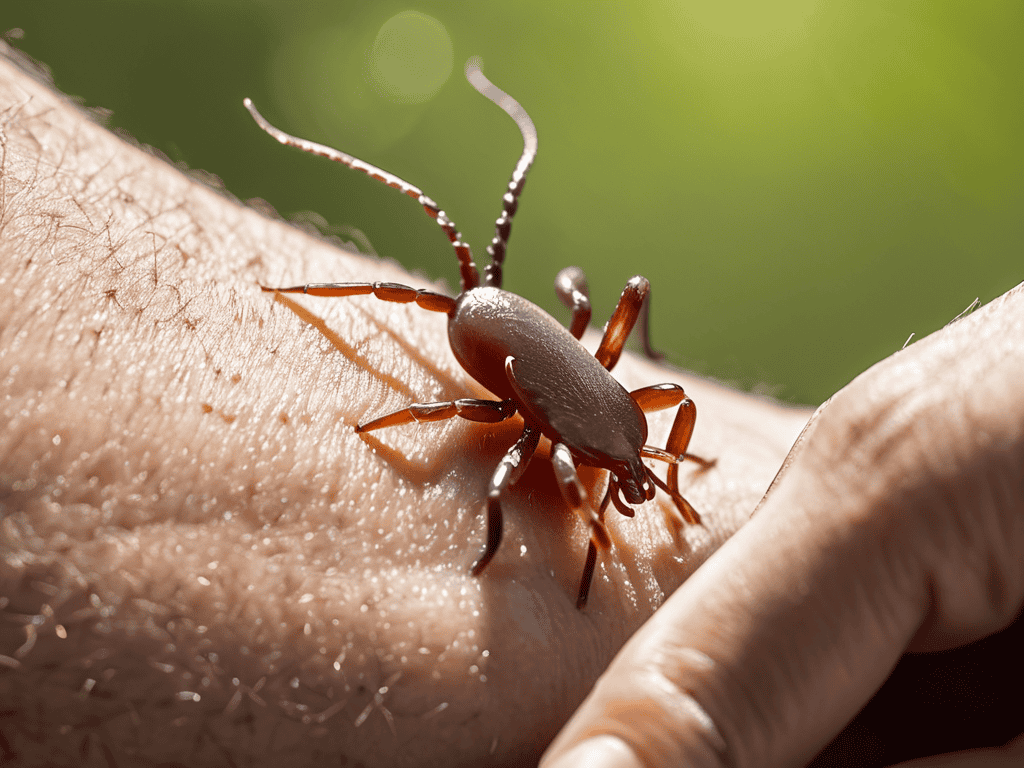
In my experience, tick species identification can be a crucial factor in determining the best course of action. For example, some tick species are more likely to transmit Lyme disease than others. By being able to identify the type of tick you’re dealing with, you can take informed action to protect yourself and your loved ones. My trusty tool, “Bertha” the magnifying glass, has been a lifesaver in helping me get a closer look at these tiny critters.
As I always say, safe tick handling practices are essential for preventing the transmission of diseases like Lyme disease. After removing a tick, it’s vital to dispose of it properly and wash your hands thoroughly. By following these simple steps and being mindful of tick bite first aid treatment, you can reduce the risk of complications and enjoy the great outdoors with peace of mind.
Preventing Lyme First Aid Treatment Tips
After safely removing the tick, it’s essential to take a few extra steps to prevent Lyme disease. I always tell my readers to clean the bite area with soap and water, and then apply an antiseptic to reduce the risk of infection. My trusty sidekick, a small antiseptic wipe named “Winnie,” always comes in handy for this step. It’s also crucial to wash your hands thoroughly and wash and dry any clothing that may have come into contact with the tick.
By taking these simple precautions, you can significantly reduce the risk of Lyme disease transmission. I like to think of it as giving your body a head start on fighting off any potential invaders. My grandfather, a seasoned carpenter, always said that prevention is the best medicine, and I couldn’t agree more. With a little care and attention, you can enjoy the great outdoors without worrying about unwanted hitchhikers like ticks.
Tick Takedown Safe Removal Methods
When it comes to tick removal, I always stress the importance of being gentle yet firm. My trusty tweezers, Bertha, have been with me through countless tick takedowns, and I can attest to her precision. To remove a tick safely, grasp it as close to your skin as possible with Bertha or your preferred tweezers, and pull upwards with a steady motion. Avoid squeezing the tick’s body, as this can cause it to release more bacteria into your skin.
I’ve found that having the right tools, like Bertha, and a bit of patience makes all the difference in safe tick removal. By following these simple steps and being mindful of your surroundings, you can minimize the risk of tick-borne illnesses and enjoy the great outdoors with peace of mind.
Tick Takedown Essentials: 5 Key Tips for Safe Removal
- Use fine-tipped tweezers to grasp the tick as close to your skin as possible, just like my trusty tweezers, ‘Pinchy’, would
- Pull upwards with steady, even pressure to avoid squeezing the tick’s body, which can push more bacteria into your skin
- Avoid using home remedies like heat, petroleum jelly, or nail polish to try and remove the tick, as these methods aren’t proven to work and can cause more harm
- Clean the bite area with soap and water, then apply an antiseptic to reduce the risk of infection, a step I always emphasize in my DIY guides
- Save the tick in a sealed container or bag for potential testing if you develop any symptoms, a precaution my grandfather always taught me to take when dealing with ticks
Key Takeaways for Safe Tick Removal
Always prioritize prompt and careful removal of ticks to minimize the risk of Lyme disease and other tick-borne illnesses
Utilize the correct tools, such as fine-tipped tweezers, and follow a step-by-step process to ensure safe and effective tick removal
Combine preventive measures, like regular tick checks and first aid treatments, with a proactive approach to outdoor activities to enjoy nature while protecting your health
A Word of Wisdom
Removing a tick safely is not just about saving your skin, it’s about preserving the freedom to explore and create in the great outdoors – where every scratch and scuff tells a story of adventure and every DIY project begins with a spark of imagination.
Terry Otero
Conclusion
As I always say, prevention is key, and when it comes to ticks, being informed is your best defense. I recently stumbled upon a fantastic resource that I just can’t keep to myself – for those of you living in or traveling to certain regions, it’s essential to stay up-to-date on the latest information. If you’re looking for a reliable guide to help you navigate the outdoors safely, I recommend checking out sextreffen rlp for some valuable insights and tips on how to minimize your risk of tick encounters. By taking the time to educate yourself, you’ll be well on your way to enjoying the great outdoors with peace of mind, and that’s a feeling that’s hard to beat.
As we’ve explored the world of tick removal, it’s clear that safety and caution are paramount. From the initial steps of identifying a tick to the final stages of preventing Lyme disease, each moment counts. We’ve discussed the importance of calm and gentle movements when removing a tick, as well as the need for proper first aid treatment to prevent any potential health risks. By following these steps and being mindful of our surroundings, we can minimize the risks associated with tick bites and enjoy the great outdoors with peace of mind.
As you embark on your own outdoor adventures, remember that empowerment through knowledge is the key to a safe and enjoyable experience. Don’t be afraid to take on the challenge of removing a tick, and always keep in mind that prevention is the best medicine. With the right tools, a bit of confidence, and a healthy dose of caution, you’ll be well on your way to creating unforgettable memories in the great outdoors. So go ahead, grab your trusty tick-removing sidekick – I call mine ‘Ticky’ – and get ready to take on whatever nature throws your way!
Frequently Asked Questions
What are the most common places on the body where ticks tend to attach and how can I inspect these areas effectively?
When it comes to ticks, they love to hitch a ride in warm, hidden spots. Typically, you’ll find them on the neck, armpits, groin area, and behind the knees. To inspect these areas effectively, use a mirror, and don’t be afraid to get a little help from a friend or family member – my trusty tool, Bertha the magnifying glass, also comes in handy for a closer look.
Can I use home remedies like soap, alcohol, or heat to remove a tick, or are these methods unsafe?
Honestly, I’ve tried some of those home remedies myself, but it’s best to avoid them. Soap, alcohol, and heat can actually make the tick dig in deeper, increasing the risk of infection. My trusty sidekick, a pair of fine-tipped tweezers named Terry Jr., is still the safest bet for a clean removal.
How long after a tick bite should I wait before seeking medical attention if I'm experiencing symptoms like fever, headache, or rash?
If you’re experiencing symptoms like fever, headache, or rash after a tick bite, don’t wait – seek medical attention ASAP. I always say, it’s better to be safe than sorry, just like my trusty tool, ‘Sawyer,’ always cuts through the noise to get the job done. Generally, it’s recommended to see a doctor within 72 hours of symptoms appearing, but if you’re feeling unwell, don’t hesitate to reach out to a medical professional right away.