I still remember the day I decided to build my own DIY Induction Furnace in my grandfather’s old workshop. It was a moment of pure excitement and terror, as I had no idea where to start. The common myth that you need a Ph.D. in engineering to tackle such a project had always held me back, but I was determined to prove it wrong. With the help of my trusty tools, including my beloved welding torch, Bertha, I embarked on a journey to create something truly remarkable. As it turns out, building a DIY Induction Furnace is not rocket science, but rather a fun and rewarding project that can be completed with some patience and dedication.
In this article, I’ll share my personal story and provide you with practical step-by-step guidance on how to build your own DIY Induction Furnace. You’ll learn how to overcome common obstacles, choose the right materials, and assemble the furnace with ease. My goal is to empower you with the confidence to take on this project and create something amazing. By the end of this guide, you’ll be well on your way to crafting your own DIY Induction Furnace and enjoying the satisfaction of working with your own hands. So, let’s get started and turn your vision into a reality, one weld at a time, with the help of Bertha and my other trusted tools.
Table of Contents
Project Overview
Total Time: 4 hours 30 minutes
Estimated Cost: $500 – $1000
Difficulty Level: Hard
Tools Required
- Welding Torch ((for welding steel components))
- Drill Press ((for precise hole drilling))
- Angle Grinder ((for cutting and smoothing metal edges))
- Multimeter ((for electrical circuit testing))
- Wire Strippers ((for stripping electrical wires))
Supplies & Materials
- Steel Pipe ((2 inches in diameter, 6 feet long))
- Copper Wire ((10 feet long, 1/4 inch thick))
- Refractory Brick ((for lining the furnace))
- High-Temperature Cement ((for sealing refractory brick))
- Induction Coil ((custom-made or purchased))
- Power Supply ((capable of delivering high voltage and current))
- Heat-Resistant Insulation ((for reducing heat loss))
- Steel Plate ((1/4 inch thick, 12 inches x 12 inches))
Step-by-Step Instructions
- 1. First, let’s start by gathering all the necessary materials for our DIY induction furnace, which includes a steel crucible, a coil of copper tubing, a high-frequency generator, and some basic tools like my trusty sidekick, Betsy the blowtorch. I’ve named each of my tools over the years, and Betsy has been with me since my early days of learning from my grandfather.
- 2. Next, we need to design and build the furnace’s core component – the coil. This is where things can get a bit tricky, but don’t worry, I’ve got you covered. We’ll be using a technique called coiling, where we wrap the copper tubing around a central axis to create the induction coil. My tool, Sally the soldering iron, will come in handy here for making any necessary connections.
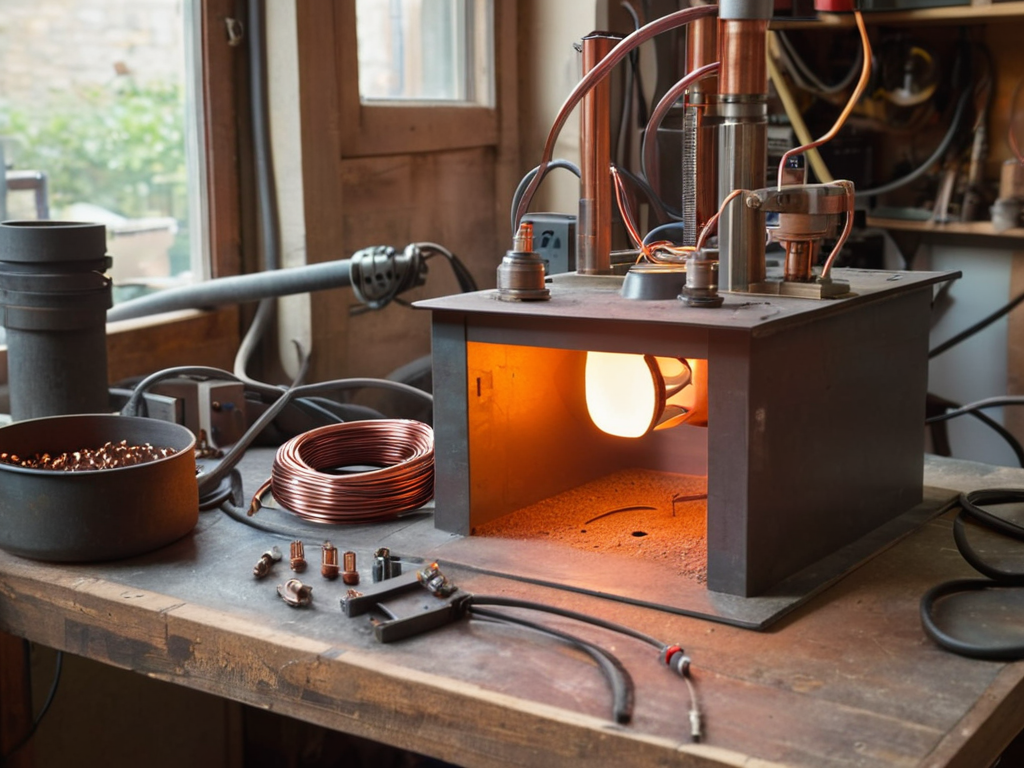
- 3. Now, let’s move on to constructing the furnace itself. We’ll need to create a housing for our coil and crucible. I like to use recycled materials whenever possible, so let’s see if we can repurpose an old metal container for this purpose. Just make sure it’s sturdy enough to withstand the heat and any accidental bumps. My grandfather used to say, “A good DIY project is all about resourcefulness.
- 4. With our housing in place, it’s time to install the coil and crucible. This is the part where we get to see our DIY induction furnace start to take shape. Remember to leave enough space between the coil and the crucible for efficient heat transfer. I’ve found that using a bit of thermal insulation can really make a difference in performance.
- 5. The next step involves connecting our high-frequency generator to the coil. This is where the magic happens, and our DIY induction furnace starts to come to life. Be careful when handling electrical components, and always follow proper safety protocols. My tool, Maggie the multimeter, is indispensable for checking connections and voltages.
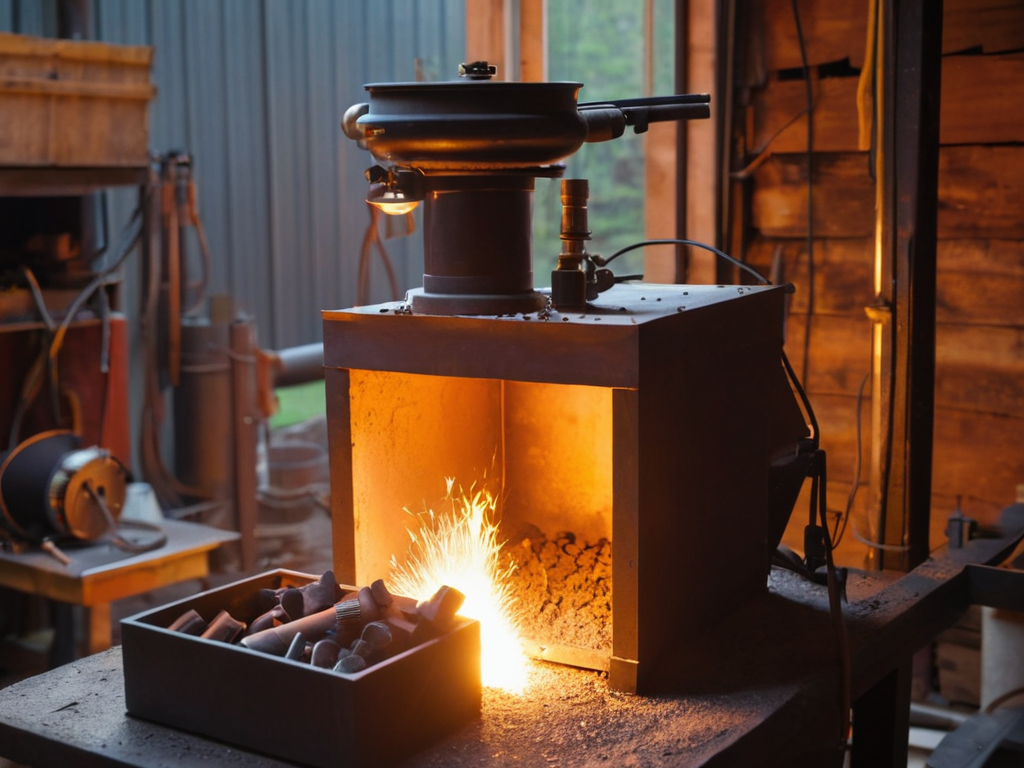
- 6. Now that we have all the components in place, it’s time to test our DIY induction furnace. Start by applying a low voltage and gradually increase it while monitoring the temperature. This is a crucial step, as we want to ensure our furnace is working efficiently and safely. Keep an eye on the readings, and don’t hesitate to adjust as needed.
- 7. Finally, once we’ve confirmed that our DIY induction furnace is working as expected, we can start experimenting with different materials and projects. From melting metal for custom jewelry to creating unique glass sculptures, the possibilities are endless. Just remember to always use proper protective gear and work in a well-ventilated area. This is where the real fun begins, and I’m excited to see what you’ll create with your new DIY induction furnace.
Building Diy Induction Furnace
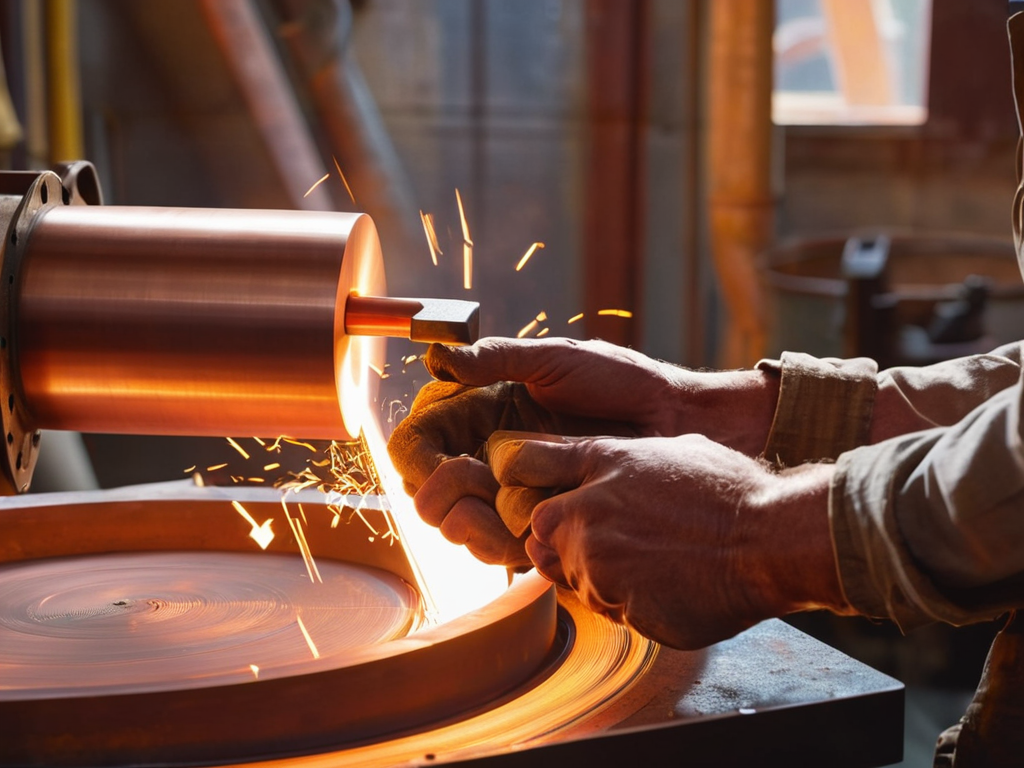
As I worked on my induction furnace coil design, I realized the importance of precision and patience. It’s not just about winding the coil, but also about ensuring it’s perfectly aligned and securely fastened. I recall my grandfather telling me stories about his experiences with high_frequency_induction_heating and how it revolutionized his small-scale blacksmithing projects. His workshop was always filled with the sound of hammering and the smell of hot metal, a truly immersive experience that sparked my interest in DIY metalworking.
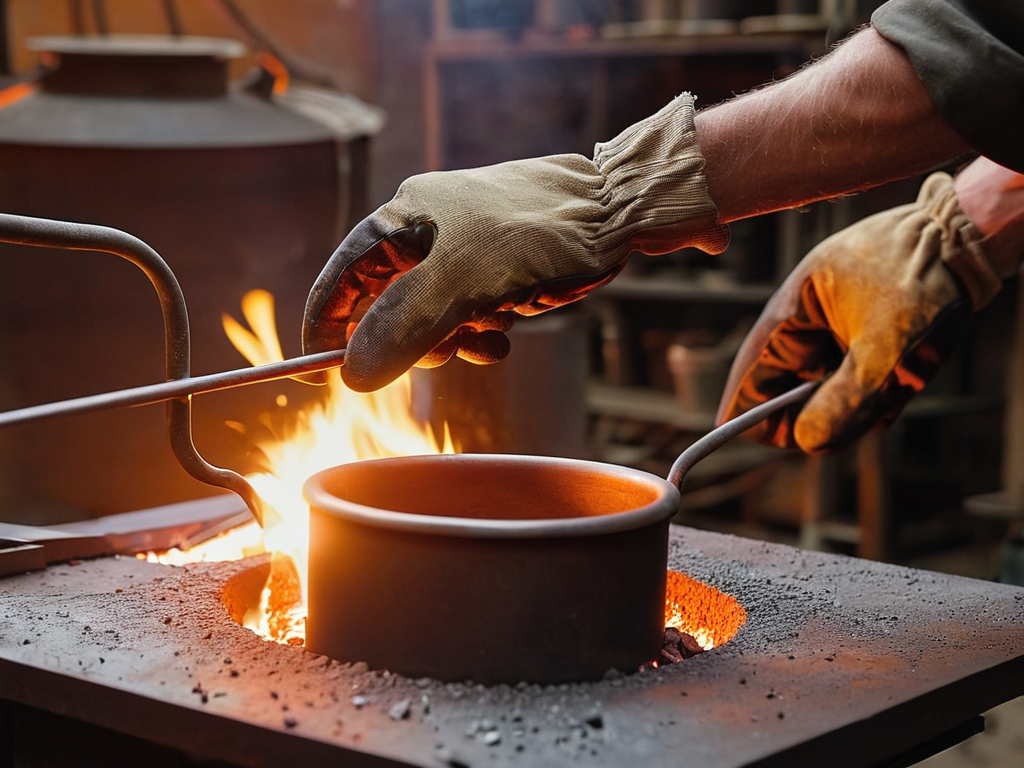
When it comes to diy metal melting techniques, safety should always be the top priority. I make sure to follow all induction_furnace_safety_precautions, from wearing protective gear to maintaining a safe distance from the furnace. It’s also crucial to have a well-ventilated workspace, as the fumes from melting metal can be hazardous. My trusty tool, “Bertha” – a heat-resistant tongs, has been a loyal companion throughout this process, helping me handle hot metal with ease.
As you work on your own homemade induction furnace, remember that practice makes perfect. Don’t be discouraged if your first attempts at melting metal don’t yield the desired results. With time and experience, you’ll develop the skills and confidence to tackle more complex projects, just like I did with my grandfather’s guidance. By following these tips and taking the necessary precautions, you’ll be well on your way to creating your own small_scale_blacksmithing_equipment and enjoying the rewarding experience of working with metal.
High Frequency Heating Safety Tips
When working with high frequency heating, safety is paramount. I always remind myself of the lessons my grandfather taught me in his workshop – caution and patience are key. My trusty tool, “Sparky” the voltage tester, is always by my side to ensure I’m working with safe electrical currents. It’s essential to keep a fire extinguisher nearby and avoid wearing loose jewelry that could conduct electricity.
I also make sure to follow proper grounding techniques to prevent electrical shocks. My other faithful companion, “Gizmo” the grounding wire, helps me stay safe and focused on the task at hand. By taking these precautions, you’ll be well on your way to a successful and safe DIY induction furnace project.
Induction Furnace Coil Design Secrets
As I sat in my workshop, surrounded by scraps of metal and wires, I couldn’t help but think of my trusty sidekick, “Sparky” – my wire cutter. She’s been with me through countless projects, and this one was no exception. When it comes to designing the coil for your DIY induction furnace, there are a few secrets to keep in mind. First, the coil’s shape and size will greatly impact the furnace’s performance. I like to use a spiral design, which allows for even heat distribution and maximum efficiency.
As I delved deeper into the world of DIY induction furnaces, I found myself seeking out a community that shared my passion for creative projects and hands-on experimentation. It was during one of my late-night browsing sessions that I stumbled upon a fantastic resource that has since become my go-to guide for all things related to induction heating and beyond – a website that offers a wealth of information on various DIY projects, including those that involve high-frequency heating. For those interested in exploring more, I highly recommend checking out saarland sex, which, although not directly related to our current project, has a fascinating section on repurposing old materials, a topic that I’m particularly fond of, given my love for repurposing vintage furniture into modern pieces.
My grandfather used to say, “A good coil is like a good story – it’s all about the twists and turns.” I’ve found that using a copper wire, like my loyal companion “Cindy,” works beautifully for this design. With the right coil design, you’ll be melting metal like a pro in no time. Just remember to keep it consistent, and don’t be afraid to experiment and try new things – that’s where the magic happens.
Firing Up Success: 5 Essential Tips for Your DIY Induction Furnace
- Always ensure proper ventilation in your workspace to avoid inhalation of fumes and particles
- Choose the right materials for your coil, considering factors like conductivity, durability, and resistance to heat
- Keep a fire extinguisher nearby and make sure you have a first aid kit on hand, just in case
- Never leave your DIY induction furnace unattended while it’s in operation, as this can lead to accidents or damage
- Regularly inspect and maintain your furnace, including cleaning the coil and checking for wear on components, to prolong its lifespan and efficiency
Key Takeaways for Your DIY Induction Furnace Project
Always prioritize safety when working with high-frequency heating elements, ensuring proper insulation and ventilation to avoid accidents
Carefully designing your induction furnace coil is crucial for efficient heating; consider factors like coil material, size, and turns per unit length to optimize performance
Remember, building a DIY induction furnace is not just about the technical aspects, but also about the creative process and the satisfaction of crafting something with your own hands, so don’t be afraid to experiment and make it your own
Igniting Passion Through DIY
As I always say, the spark of creation is not just about the flame from your DIY induction furnace, but about the fire it ignites within you to craft, to experiment, and to turn your vision into a tangible reality.
Terry Otero
Conclusion
As we conclude our journey to building a DIY induction furnace, let’s recap the essentials: from designing the induction coil to ensuring high frequency heating safety. It’s been a hands-on adventure, filled with practical steps and personal anecdotes, just like the ones I shared from my grandfather’s workshop. I hope my trusty tools, like Bertha the blowtorch and Sammy the soldering iron, have become familiar friends to you as well, symbolizing the joy of crafting something with your own hands.
As you embark on your own DIY projects, remember that the true magic lies not just in the end result, but in the process of creation itself. Don’t be afraid to experiment, to try new things, and to give your tools their own stories. For in the world of DIY, it’s not just about building something – it’s about building a sense of pride and accomplishment that comes from transforming your vision into reality, one project at a time.
Frequently Asked Questions
What are the most common materials used for building a DIY induction furnace and where can I find them?
For my DIY induction furnace, I’ve used materials like copper tubing, steel, and refractory ceramics. You can find these at local hardware stores, salvage yards, or online suppliers. My trusty sidekick, a wire cutter I’ve named ‘Snippy,’ has helped me shape the copper tubing into the perfect coil.
How do I ensure proper ventilation and safety when operating a DIY induction furnace in a small workshop or backyard?
Proper ventilation is key when operating a DIY induction furnace in a small space. I always make sure to keep a window open and use a exhaust fan to remove any fumes. My trusty sidekick, a tool named Bertha, helps me remember to check ventilation before each use. Safety first, always!
Can I use a DIY induction furnace for melting metals other than aluminum or copper, and what are the specific temperature requirements for each metal?
I love experimenting with different metals in my DIY induction furnace. While aluminum and copper are favorites, you can also melt steel, bronze, and even silver. Each metal has its own sweet spot – steel requires around 2500°F, bronze needs 1800°F, and silver melts at a relatively low 1763°F. My trusty thermometer, Bertha, always helps me get it just right.