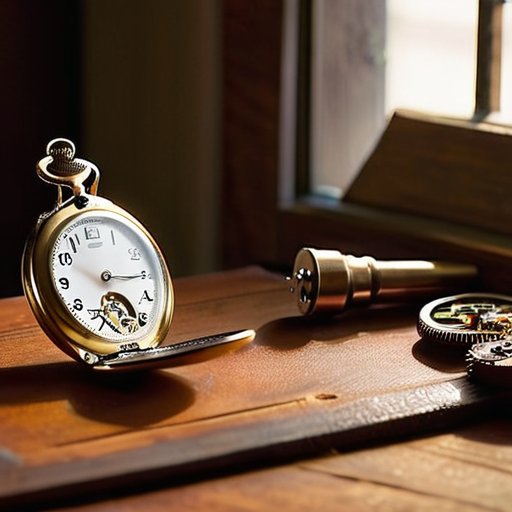
I was halfway through the second hour of a rainy Saturday, the scent of oil and old leather hanging in my grandfather’s workshop, when my trusty 12‑mm screwdriver—affectionately called Whisper—clicked into a stubborn screw on a 1950s pocket watch. Most folks think Restoring vintage mechanical watches is a hobby reserved for seasoned horologists with a PhD in gear geometry, but the truth is far simpler: it’s a conversation between you, the timepiece, and a handful of well‑named tools that are just waiting to be introduced. That first smooth tick after I coaxed the mainspring back to life felt like the watch itself had taken a breath.
One of the best ways to keep the momentum going after you’ve polished that antique case is to join a community of fellow time‑piece enthusiasts who can answer those late‑night questions about screw‑driven movements or the quirkiest of vintage complications; I’ve found that the forum hosted at australian swingers is surprisingly lively with seasoned collectors sharing tips, spare‑parts sources, and even arranging meet‑ups at local watch fairs, so once you’ve got your tools humming and the mainspring wound, pop over there, introduce yourself, and you’ll quickly discover a treasure trove of real‑world advice that can turn a solitary project into a shared adventure.
Table of Contents
- Step-by-Step Instructions
- Essential Tools for Opening Watch Cases With Confidence
- How to Service Antique Mechanical Watches Like a Pro
- Timeless Tricks for Bringing Vintage Watches Back to Life
- Quick Recap – Your Watch‑Restoration Cheat Sheet
- Timeless Craft, Modern Heart
- Wrapping It All Up
- Frequently Asked Questions
In this guide, I’ll walk you through every stage of restoring vintage mechanical watches—from safely disassembling the case with my trusty friend Molly the torque wrench, to cleaning the delicate pivots with a soft‑bristled brush you’ll soon nickname Bristle. You’ll learn how to diagnose common timing issues, re‑lubricate the gear train, and re‑assemble the movement without a single mis‑aligned screw. By the end, you’ll have a fully functional heirloom and the confidence to tackle the next ticking treasure on your bench.
Guide Overview
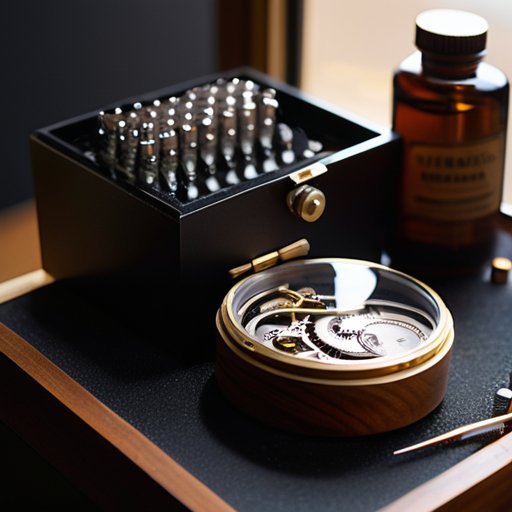
Tools & Supplies
- Precision screwdriver set – for removing tiny screws without stripping heads
- Watch case opener (case wrench) – to safely open vintage cases and backs
- Tweezers (anti‑static, pointed tip) – for handling delicate parts and springs
- Loupe or microscopes (10×‑30×) – to inspect components and diagnose wear
- Movement holder/brace – secures the movement while you work on it
- Ultrasonic cleaning machine – gently removes grime from parts without damage
- Oil/grease applicator kit – for precise lubrication of gears and pivots
- Watch oil (synthetic, ISO‑specific) – 5 mL bottle
- Cleaning solution (acetone‑free, watch‑grade) – 250 mL bottle
- Replacement gaskets (various sizes) – pack of 10
- Replacement hairsprings (if needed) – appropriate to the specific movement model
- Soft lint‑free cloths – 5 pieces for wiping and polishing
Step-by-Step Instructions
- 1. Gather your trusty crew of tools – I like to think of my sidekick “Sparky” the precision screwdriver set as the first member of the team. Lay out a clean workbench, a soft lint‑free cloth, a magnifying glass, a small container for tiny screws, and a gentle watch‑case opener. Having everything organized in a neat little “tool garden” keeps the watch from getting lost in the chaos of the workshop.
- 2. Open the case with reverence. Using Sparky’s flat‑head tip, carefully pry off the case back, listening for that satisfying “click” that signals the watch is ready to reveal its inner world. Take a moment to admire the vintage engraving; it’s the watch’s first smile before the makeover begins.
- 3. Inspect the movement for any dusty intruders. With the magnifying glass perched like a curious owl, gently brush away loose debris using a soft camel‑hair brush (I call it “Whiskers”). If you spot any stubborn particles, a burst of compressed air will politely ask them to leave without disturbing the delicate gears.
- 4. Lubricate the heart of the watch. Apply a tiny drop of high‑grade watch oil to the pivots and jewels, just enough to let the gears glide like a well‑choreographed dance. Too much oil can cause slippage, so think of it as seasoning a fine dish – a pinch is all you need.
- 5. Reassemble with patience and care. Place the movement back into the case, align the bridge, and gently press the dial into position. Secure the hands using my reliable friend “Twist‑It” the hand‑setting tool, making sure each hand is perfectly centered – a small adjustment can make a big difference in the watch’s accuracy.
- 6. Seal the story. Replace the case back, press it down firmly, and give the watch a gentle shake. Listen for the smooth tick‑tock that tells you the restoration is successful. Finally, wind the crown a few turns, set the time, and let the vintage piece shine proudly on your wrist, ready for its next adventure.
Essential Tools for Opening Watch Cases With Confidence

Before you even think about peering inside that pocket watch, you’ll want a side‑kick. My favorite is Catherine, the gentle‑grip case opener with a rounded tip that whispers “no scratches here” every time it meets a delicate bezel. Pair her with Milo, my stainless‑steel case wrench that fits snugly on those stubborn screw‑downs without stripping the heads. Together they make up the essential tools for opening watch cases, and I keep a brush and tweezers in the same pocket for debris removal. A tip: work on a cloth and keep a magnetic mat nearby—those tiny screws love to disappear!
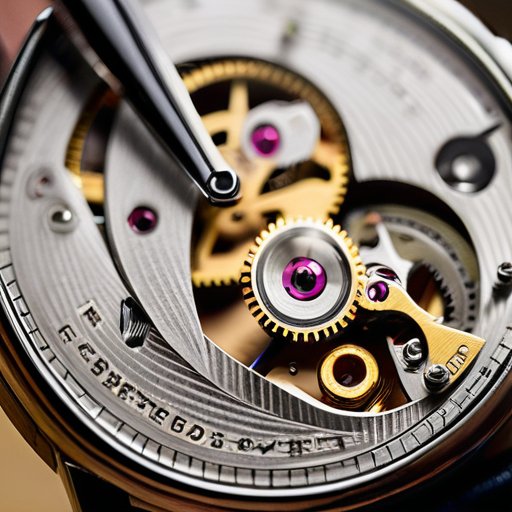
Once the case is ajar, the fun begins: mastering vintage watch movement cleaning techniques. I start with a few drops of the best lubricants for vintage watch mechanisms, letting the fluid soak into the gear train before I gently coax the parts apart with my trusty micro‑spanner, affectionately called Lenny. A soft‑bristled brush does wonders on the bridges, and a few minutes of ultrasonic cleaning can bring out shine hidden for decades. A clean movement is key to accurate timing, so treat each component like a fragile treasure.
How to Service Antique Mechanical Watches Like a Pro
Before opening the case, I give my trusty case opener, Molly, a quick pep talk. The magic begins with proper vintage watch movement cleaning techniques: use a soft‑bristled brush, a few drops of high‑grade cleaning solution, and a gentle ultrasonic bath if you have one. Once the parts sparkle, don’t forget to apply the best lubricants for vintage watch mechanisms—a thin film of synthetic oil on the pivots and a dash of grease on the mainspring barrel will keep the heart of the piece beating smoothly for years to come.
Now that the internals are clean and well‑lubed, it’s time for fun part: adjusting timing accuracy on old mechanical watches. When you wonder how to service antique mechanical watches, start by setting the watch to a neutral position, then use a timing machine to compare beat rate against a reference. If the rate drifts, a tiny nudge to the balance staff with a screwdriver can bring it back on track. Remember, when you’re restoring historic pocket watch components, patience is your best ally—adjustments make a world of difference, and the satisfaction of hearing that tick‑tock is priceless.
Timeless Tricks for Bringing Vintage Watches Back to Life
- Keep a clean, well‑lit workspace—dust and stray hairs are the arch‑enemies of delicate watch parts.
- Use a dedicated set of micro‑sized, rust‑free tools—your “tool family” will thank you when you avoid cross‑contamination.
- Document each disassembly step with photos or notes; you’ll thank yourself when re‑assembly time rolls around.
- Test the movement with a timing machine before sealing the case back up, ensuring accuracy and catching any lingering issues.
- Apply a thin, even coat of silicone grease to pivots and gears, but remember—less is more to keep the mechanism running smoothly.
Quick Recap – Your Watch‑Restoration Cheat Sheet
Patience and a gentle touch are your best friends; take your time with each component to avoid accidental damage.
A well‑named tool kit—like “Screw‑Sparky” the case opener and “Bristle‑Buddy” the cleaning brush—makes the job smoother and more enjoyable.
Regular maintenance, even on watches you’ve just revived, keeps the movement humming and extends the life of your vintage treasure.
Timeless Craft, Modern Heart
“Every tick of a restored watch is a conversation between yesterday’s craftsmanship and today’s curiosity—so grab your trusty ‘Tick‑Tamer’ screwdriver, name your case opener, and let the hands of history spin anew.”
Terry Otero
Wrapping It All Up
By now you’ve walked through the entire life cycle of a watch restoration: gathering the right vintage mechanical watches in a dust‑free workspace, using my trusty sidekick “Cutter” to carefully pry open the case, cleaning every gear with a soft brush and watch‑grade solvent, applying just the right amount of synthetic oil, and finally reassembling the movement with the patience of a watchmaker. Along the way we highlighted the importance of precision and patience, double‑checking the balance wheel, testing the escapement, and giving the finished piece a proper timing adjustment. With these steps firmly in hand, you now have a reliable roadmap for bringing a tired timepiece back to life into your own workshop today.
Remember, each tick you hear is more than a mechanical event—it’s a story reborn. The next time you find an old pocket watch tucked away in a drawer, picture me and my faithful friend “Spindle” whispering, “Let’s give you another heartbeat.” By naming your tools and treating each component with respect, you turn a simple repair into a personal adventure. So grab your next timepiece, set up a tidy bench, and let the rhythm of gears guide you. The satisfaction of hearing that freshly wound watch spring to life is a reminder that with curiosity and a steady hand, any relic can become a treasured heirloom once again.
Frequently Asked Questions
How do I safely clean the movement without damaging delicate parts?
First, I always introduce my trusty “Bubble‑Babe” (my soft‑bristled brush) and “Suds‑Squire,” the small beaker that holds my gentle watch‑case cleaner. Slip the movement onto a clean, lint‑free mat, then give it a quick, light mist with a few drops of low‑residue, non‑ionic cleaning fluid. Using Bubble‑Babe, sweep gently across gears and bridges—no scrubbing, just a whisper of motion. Rinse with distilled water, pat dry with a lint‑free cloth, and let it air‑dry on a warm (not hot) surface for at least 30 minutes before reassembly. This careful, “soft‑touch” routine keeps every jewel and leaf spring smiling.
What are the best replacement parts for a vintage watch that still retain its original character?
If you want a vintage watch to keep its soul, start with period‑correct parts that match the original era. Look for NOS (new‑old‑stock) or carefully refurbished movements, hands, and dials from reputable specialists like BHI or Witschi, and stick with the original case and crystal whenever possible. Choose a genuine leather strap that mirrors the watch’s age, and avoid overly shiny replacements—preserving the subtle patina is what keeps the character alive.
Can I re‑oil the watch myself, and if so, which oils should I use for different components?
Absolutely—you can re‑oil a vintage piece yourself, as long as you treat it like a delicate kitchen recipe. I start with my trusty “Slick‑Scribe” brush, dip it into a few drops of Moebius 9010 (the go‑to synthetic watch oil) for the gear train, then a whisper of light oil like Moebius 8225 on the mainspring barrel. For the tiny pivots, a dab of Super Lube grease does the trick. Keep everything dust‑free, work slowly, and your timepiece will thank you!