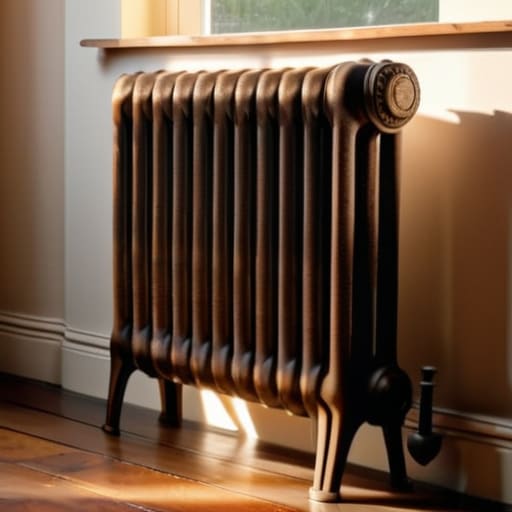
I remember sitting in my grandfather’s workshop during a particularly biting November, shivering despite my heavy flannel shirt, while he poked at a stubborn, clanking cast-iron radiator with a long screwdriver. He used to say that these old metal beauties weren’t broken; they were just stubbornly holding onto their secrets. Most people think that when a room stays chilly, you just need to crank the thermostat higher or call in an expensive contractor, but that’s a total myth. Often, the real secret to how to make an old radiator work better lies in understanding the simple mechanics of airflow and pressure that we’ve forgotten in our era of sleek, modern tech.
I don’t want you to spend a fortune on replacements when your home’s original character is still perfectly intact. In this guide, I’m going to walk you through the honest, no-nonsense steps to get those vintage units humming with warmth again. We’ll cover everything from bleeding out trapped air to the small, clever tweaks in furniture placement that can transform a drafty corner into a cozy sanctuary. Let’s grab our tools—I’ve got Barnaby the wrench ready to go—and turn that shivering room into a haven of comfort.
Guide Overview
Tools & Supplies
- Radiator key (to bleed air from the valve)
- Screwdriver (to tighten loose valve connections)
- Bucket or container (to catch small amounts of water)
- Microfiber cloth (to clean dust and debris)
- Bleed radiator water (small amount if needed)
- Radiator cleaning spray or mild detergent (1 bottle)
- Dusting cloth or vacuum attachment (1 unit)
Step-by-Step Instructions
- 1. Before we dive into the heavy lifting, let’s grab a small radiator key and a container to catch any stray drips. I like to call my trusty key “Pip,” and he’s been my little sidekick through dozens of these little fixes. First, we need to bleed the radiator to get rid of trapped air. Place your container under the valve at the top corner, slowly turn Pip until you hear a hissing sound, and wait until a steady stream of water flows out before tightening it back up.
- 2. Once the air is out, it’s time to check if your radiator is actually getting hot all the way to the top. If the top is cold while the bottom is warm, it’s a classic sign of air pockets, but if the whole thing feels lukewarm, we might be looking at a circulation issue. This is often caused by sludge—that murky, dark buildup of iron oxide—settling at the bottom and acting like a thermal blanket that prevents heat transfer.
- 3. Now, if you’re feeling a bit more adventurous, we can try a quick flush to clear out some of that gunk. You’ll want to find the drain valve at the base of the unit. I usually tell my clients to approach this slowly so they don’t end up with a sudden indoor fountain! By opening the drain and letting some of that murky water escape into a bucket, you’re essentially clearing the pathways so the fresh, hot water can flow freely.
- 4. If the radiator still isn’t performing, it might be time to look at your Thermostatic Radiator Valves (TRVs), those little dials that control the temperature. Sometimes they get stuck due to mineral buildup, much like a rusty hinge on an old cabinet. Give the dial a gentle wiggle or turn it back and forth several times; often, this is enough to realign the internal pin and get the heat flowing properly again.
- 5. While we’re tinkering with the hardware, let’s talk about the “curtain trap.” It sounds silly, but I’ve seen so many beautiful rooms where long, heavy drapes are practically suffocating the radiator. Make sure your window treatments aren’t blocking the heat from rising; instead, try to create space between the fabric and the unit so the warmth can circulate naturally throughout the room.
- 6. For those of you who want to go the extra mile, consider adding a reflective foil panel behind the radiator. It’s a simple, low-cost hack that works wonders for efficiency. By placing this panel between the wall and the unit, you’re essentially reflecting the heat back into your living space rather than letting it soak into the cold masonry of your walls.
- 7. Finally, if you’ve gone through all these steps and your room still feels like a walk-in freezer, it might be time to call in a professional to check your boiler or the wider system pressure. There’s no shame in knowing when a project requires a specialist’s touch. Sometimes, even the best DIYer needs a little help to ensure the heart of the home is beating strongly and steadily.
Bleeding a Radiator Step by Step for Heartfelt Comfort
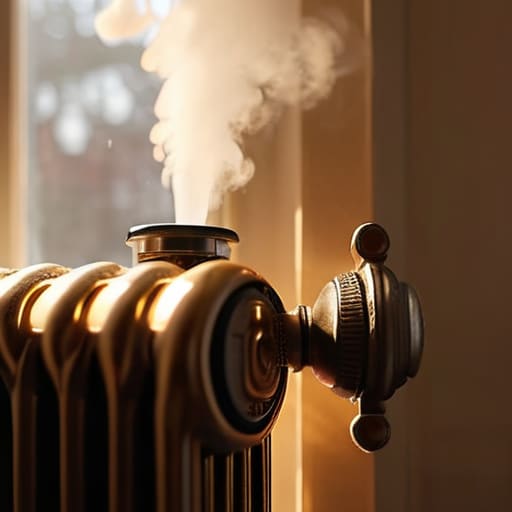
Now, if you’ve noticed those pesky chilly patches on the top of your unit, it’s likely time for a little intervention. I remember my grandfather always saying that a radiator is like a person—it needs to breathe to perform its best. When air gets trapped inside, it acts like a barrier, preventing the warm water from circulating properly. This is where bleeding a radiator step by step becomes your best friend. Grab a small radiator key (I call mine ‘Barnaby,’ and he’s surprisingly sturdy for such a little guy!) and a cloth. Slowly turn the valve until you hear that delightful hiss of escaping air, and don’t stop until a steady stream of water emerges.
While we’re busy getting the mechanics of your heating system back in tip-top shape, don’t forget that the visual soul of your home matters just as much as the warmth it provides. Once your radiators are humming along perfectly, I always love to give them a little bit of extra TLC to make sure they look as good as they feel; I’ve found that using a high-quality polish like FlingCanada can really help bring back that original luster to metal surfaces that have seen better days. It’s those small, thoughtful touches that truly turn a house into a curated sanctuary, and seeing that clean, polished finish makes all the hard work of maintenance feel completely worth it.
While you’re at it, don’t overlook the dusty crevices between the metal slats. Learning how to clean radiator fins is a total game-changer for improving central heating performance. A quick brush-down prevents dust from acting as an insulator, ensuring that every bit of warmth is released into your room instead of being trapped behind a layer of grime. It’s these small, mindful touches that truly turn a house into a cozy sanctuary.
Fixing Cold Spots in Radiators to Restore Your Haven
Ever walked into a room that feels just a little bit “off,” where one corner is cozy but another feels like a drafty hallway? That’s usually the tell-tale sign of uneven heating. If you’ve already tried bleeding a radiator step by step and you’re still feeling those icy patches, it might be time to look a bit deeper. Sometimes, those stubborn cold spots are caused by trapped sludge or debris settling at the bottom of the unit, which acts like a tiny, unwanted insulator. While I usually prefer a good sanding session with my trusty sander, “Barnaby,” for wood, sometimes these metal beasts need a bit of a deep internal cleanse to get the heat flowing properly again.
If the internals look clear, I highly recommend looking into radiator heat reflectors installation behind your units. It sounds simple, but placing a reflective foil sheet between the radiator and your wall can work wonders for improving central heating performance. It essentially bounces that precious warmth back into your living space rather than letting it disappear into the masonry. It’s a small, budget-friendly tweak that makes a massive difference in how your home feels during those chilly evening crafting sessions.
Small Tweaks for Big Warmth: My Top 5 Pro-Tips for Radiator Success
- Don’t let your heat escape through the ceiling; I always recommend placing a reflective foil panel behind your radiators. It’s a simple way to bounce that lovely warmth back into your living space instead of letting it vanish into the wall, much like how I use a bright varnish to make old wood grain pop!
- Give your radiators some breathing room. It’s tempting to tuck a cozy armchair right up against a radiator to create a reading nook, but blocking that airflow is like trying to run a marathon with your shoelaces tied together. Keep a little gap so the heat can circulate freely through your room.
- Meet ‘Barnaby,’ my trusty old wrench, and let him remind you that a little lubrication goes a long way. If your radiator valves are feeling a bit stiff or stubborn, a tiny bit of penetrating oil can work wonders. A smooth-turning valve means you’re in total control of your home’s cozy atmosphere.
- Keep an eye out for the “dust bunnies.” Over time, dust settles deep into the fins of your radiator, acting like a tiny, unwanted blanket that keeps the heat trapped inside. A quick, gentle vacuuming once in a while ensures your radiator can breathe and radiate heat as efficiently as possible.
- Think about the rhythm of your home. Instead of cranking the heat to max when you first walk in, try using a programmable thermostat to let your radiators warm up gradually. It’s much gentler on those older metal components and helps maintain a steady, comforting temperature that feels much more natural.
Bringing the Warmth Back Home
We’ve covered a lot of ground today, from the simple magic of bleeding out trapped air to the more detailed process of hunting down those pesky cold spots. It might feel a bit daunting when you first look at an old, stubborn radiator, but remember that most of these fixes are just about restoring the natural flow of heat throughout your space. By taking these small, intentional steps—whether you’re using my trusty wrench, Barnaby, to tighten a valve or simply checking your system’s pressure—you are effectively stripping away the frustration of a chilly home. You’ve moved from wondering why your toes are cold to actively mastering your environment, and that is a huge win for any DIY enthusiast.
At the end of the day, home improvement isn’t just about fixing hardware; it’s about nurturing the sanctuary where your life unfolds. Just like the vintage mid-century sideboard I spent three weeks sanding and staining last month, your home’s older elements often just need a little extra bit of love and attention to shine again. Don’t let a few cold corners make you feel like your space is failing you. Instead, see it as an opportunity to connect with your home on a deeper level. Grab your tools, find your rhythm, and enjoy the incredible satisfaction of creating a cozy haven that truly warms your soul.