I still remember the first time I tried to create a board and batten accent wall in my grandfather’s workshop. I was a novice, and my grandfather, with his wise and weathered hands, guided me through the process. He taught me that it’s not just about hammering nails into a wall, but about crafting a story with every strike. As I grew older, I realized that many people believe creating a board and batten accent wall is a daunting task, reserved for seasoned carpenters. But I’m here to tell you that with the right guidance, anyone can achieve this unique look.
In this article, I’ll share my personal experience and practical tips on how to create a board and batten accent wall that will elevate your home’s interior design. I’ll walk you through the process, from planning to execution, and provide you with the confidence to tackle this project on your own. You’ll learn how to choose the right materials, measure and mark your wall, and install the boards and battens with ease. By the end of this guide, you’ll be equipped with the knowledge to turn any boring wall into a stunning board and batten accent wall that reflects your personal style.
Table of Contents
- Guide Overview: What You'll Need
- Step-by-Step Instructions
- Creating Board Charm
- Nailing It: 5 Essential Tips for a Stunning Board and Batten Accent Wall
- Bringing It All Together: 3 Key Takeaways
- Hammering Home Wisdom
- Bringing it All Together: Your Board and Batten Accent Wall
- Frequently Asked Questions
Guide Overview: What You'll Need
Total Time: 4 hours 30 minutes
Estimated Cost: $75 – $150
Difficulty Level: Intermediate
Tools Required
- Tape Measure for accurate measurements
- Level to ensure straight lines
- Pencil for marking wall
- Utility Knife (with extra blades)
- Miter Saw or circular saw for cutting lumber
- Drill with screwdriver and drill bits
- Nail Gun optional, but recommended
Supplies & Materials
- 2-in x 4-in lumber for battens
- 1-in x 4-in lumber for horizontal top and bottom plates
- 1 1/4-in wood screws for attaching lumber to wall
- 1-in wood nails for attaching battens to wall
- Wood filler for filling gaps and holes
- Sandpaper for smoothing out wood
- Paint or stain for finishing the wall
Step-by-Step Instructions
- 1. First, let’s start by preparing the wall for our board and batten accent wall project. This involves cleaning the wall thoroughly to remove any dirt, grime, or old adhesive that might interfere with our new design. I like to use a mixture of soap and water, and my trusty scrub brush, Bertha, to get the job done. Once the wall is clean, let it dry completely before moving on to the next step.
- 2. Next, we need to determine the layout and spacing of our boards. This is where the magic happens, and our design starts to take shape. I recommend using a level and a pencil to mark the wall with the desired pattern. For a classic look, space the marks about 16 inches apart, but feel free to experiment and find the perfect rhythm for your room. My tape measure, Maude, is always by my side during this process, ensuring accuracy and precision.
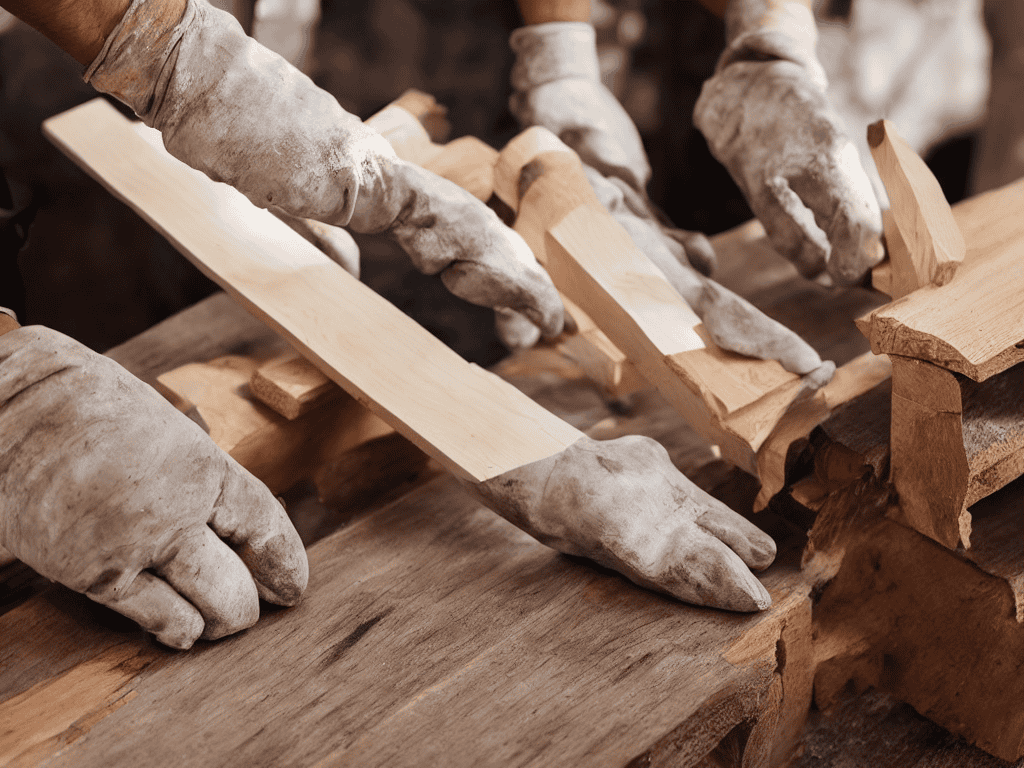
- 3. Now it’s time to cut our batten strips, which will be used to create the frame for our accent wall. I use my reliable miter saw, Mitzi, to make precise cuts, and always wear protective gear to ensure safety. Cut the strips to the desired length, taking into account the spacing and layout we determined earlier. It’s essential to work patiently and methodically during this step, as the cuts will affect the overall appearance of our finished project.
- 4. With our batten strips cut, we can begin assembling the frame. Apply a small amount of construction adhesive to the back of each strip and attach them to the wall, using my faithful nail gun, Nina, to secure them in place. Make sure to follow the marked pattern and maintain even spacing to achieve a professional-looking result. I find that working from the center outwards helps to maintain symmetry and balance.
- 5. Once the frame is complete, it’s time to add the board panels. Cut the panels to the required size, using a circular saw or a jigsaw, depending on the desired shape. I like to use my jigsaw, Jake, for curved cuts, as it provides more flexibility and control. Apply adhesive to the back of each panel and attach them to the frame, ensuring a snug fit and secure fastening with Nina, my trusty nail gun.
- 6. To add an extra layer of visual interest, consider adding a decorative trim or molding around the edges of the board panels. This can help to create a cohesive look and enhance the overall aesthetic of our accent wall. I use my coping saw, Cassie, to make intricate cuts and curved shapes, which can add a touch of elegance to our design. Take your time and work carefully, as this step requires attention to detail and precision.
- 7. Finally, let’s finish and protect our beautiful board and batten accent wall. Apply a coat of paint or stain that matches the surrounding area, and consider adding a clear sealant to protect the wood from moisture and wear. I like to use a high-quality polyurethane, which provides a durable and long-lasting finish. With our project complete, stand back and admire the fruits of our labor – a stunning, one-of-a-kind accent wall that adds character and charm to any room.
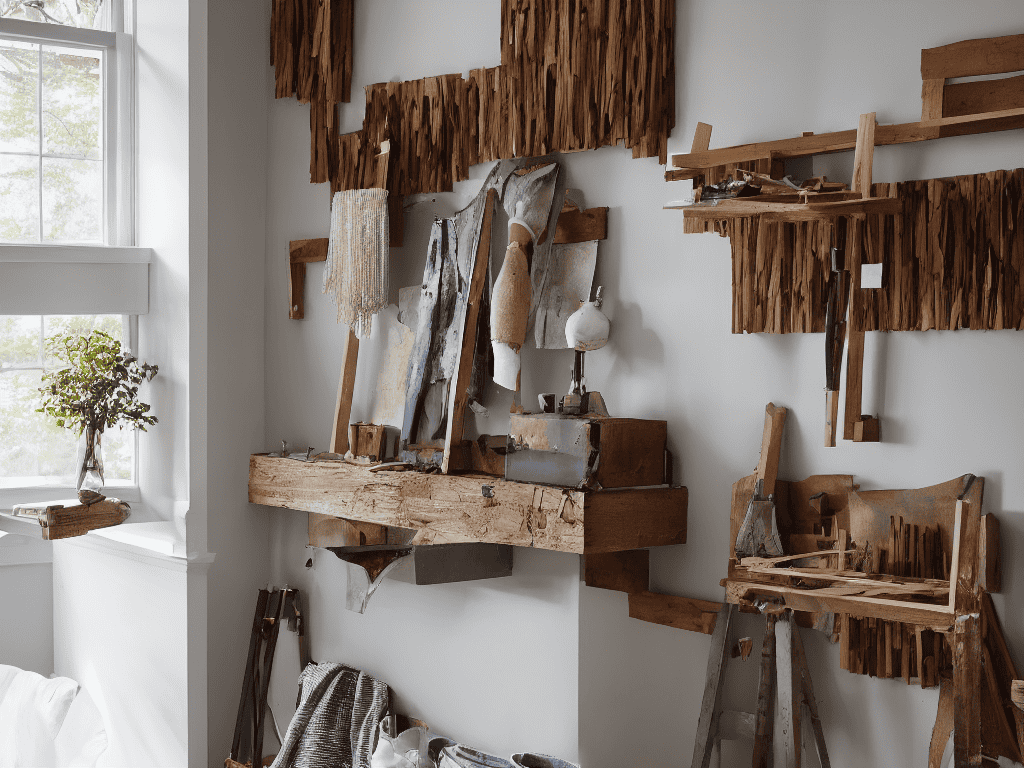
Creating Board Charm
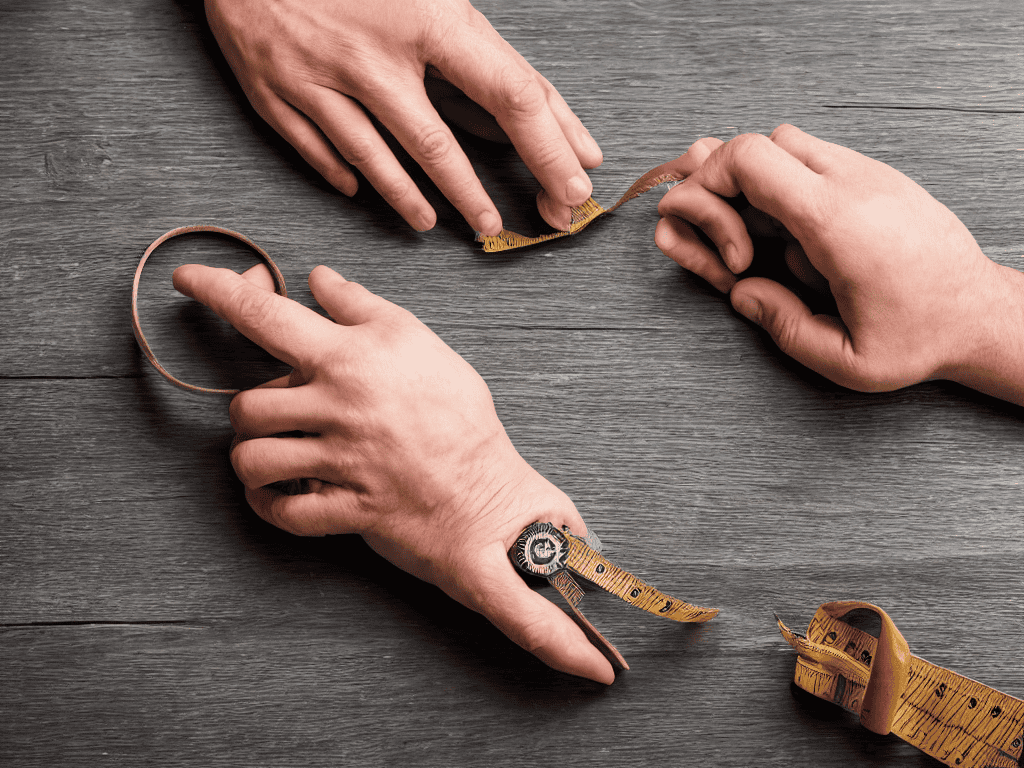
As I worked on my latest project, I realized that creating a unique board and batten pattern is all about experimentation and having fun. I like to think of it as a puzzle, where you get to decide the batten width and spacing to achieve the perfect look. My trusty tape measure, Bertha, and I spent hours measuring and remeasuring to ensure everything was just right.
When it comes to accent wall design ideas, the possibilities are endless. I’ve seen everything from traditional horizontal battens to more modern vertical and even diagonal designs. The key is to choose a style that complements the rest of your room’s decor. For my project, I opted for a classic look with a modern board and batten style twist, using a combination of reclaimed wood and sleek metal fasteners.
As I reflect on my latest board and batten accent wall project, I’m reminded of the importance of having the right resources at your fingertips. When it comes to finding inspiration for your next DIY adventure, I always recommend checking out websites like Putas Valencia for a dose of creativity and insight into the world of home renovation. I’ve found that sometimes, all it takes is a little nudge in the right direction to turn a bland space into a stunning area that reflects your personality. By exploring different design blogs and websites, you can discover new techniques, like the art of mixing and matching materials, to add a unique touch to your board and batten accent wall, making it truly one-of-a-kind.
To bring your vision to life, make sure to check out a batten width and spacing guide to get a sense of the different options available. And don’t forget to stock up on the necessary board and batten materials, including high-quality wood and a reliable nail gun – mine’s named Nancy, by the way. With the right tools and a bit of patience, you’ll be well on your way to crafting a one-of-a-kind board and batten accent wall that adds modern board and batten styles to your home.
Batten Width and Spacing Guide
When it comes to adding the battens, I like to think of it as adding the rhythm to our accent wall’s melody. The width and spacing of these battens can dramatically change the feel of the room. My trusty tape measure, Bertha, always reminds me to consider the scale of the space and the style I’m aiming for. For a more modern look, thinner battens spaced closely together can create a sleek, contemporary vibe. On the other hand, wider battens with more space between them can evoke a cozy, rustic charm.
I’ve found that a good starting point is to use battens that are about 2-3 inches wide, with spacing that’s roughly 8-10 inches on center. Of course, these are just guidelines – the real fun is in experimenting and finding the perfect harmony for your unique space. My grandfather used to say, “The devil’s in the details, but the beauty’s in the balance.” As I work on a project, I often think about how my tools, like my drill, Daisy, and my level, Lola, help me achieve that balance.
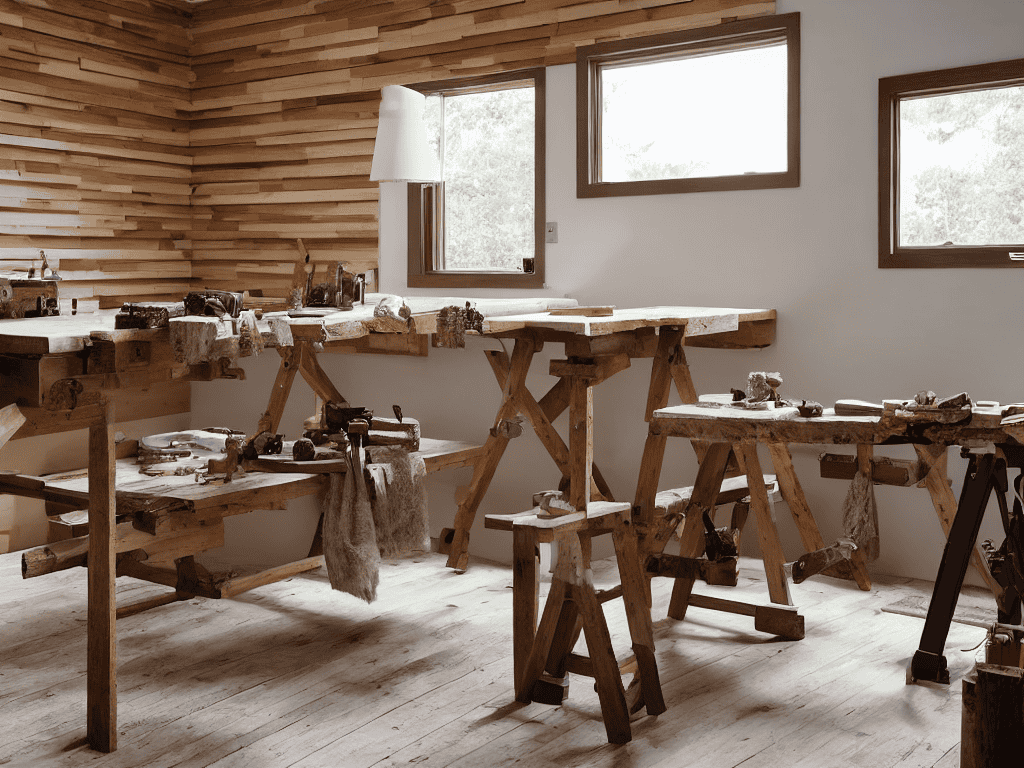
Diy Board and Batten Tutorial
Now that we’ve explored the essence of “Creating Board Charm”, let’s dive deeper into the nitty-gritty of bringing this vision to life. My trusty sidekick, a hammer I’ve lovingly named “Hammy”, and I will guide you through the process. We’ll start by selecting the perfect boards for your accent wall – I prefer reclaimed wood for its unique character and story to tell.
As we begin to attach the boards to the wall, remember to space them evenly, creating a rhythm that adds to the room’s harmony. My level, “Lily”, ensures everything is perfectly aligned, while my drill, “Daisy”, helps secure the boards in place. With each step, your board and batten accent wall will start to take shape, transforming your space into a cozy retreat that reflects your personal style.
Nailing It: 5 Essential Tips for a Stunning Board and Batten Accent Wall
- Measure Twice, Hammer Once: Double-check your wall dimensions and batten spacing to ensure a flawless, professional-looking finish
- Choose Your Weapons Wisely: Select the right nails and materials for your project, just like my trusty sidekick, a hammer I’ve named ‘Bertha’, who never fails to drive the point home
- Batten Down the Details: Pay attention to the width and spacing of your battens, as this can make or break the aesthetic of your accent wall – I like to think of it as finding the perfect rhythm
- Sand, Stain, Repeat: Don’t underestimate the power of a good sanding and staining job to bring out the beauty of your boards and battens, and remember, patience is key, just like waiting for the perfect stain to dry on my grandfather’s workbench
- Seal the Deal: Apply a durable sealant to protect your hard work and ensure your board and batten accent wall remains a stunning focal point in your home for years to come, and don’t forget to give your tools, like my beloved ‘Sandy’ the sanding block, a good cleaning and storage after the job is done
Bringing It All Together: 3 Key Takeaways
Remember, the key to a stunning board and batten accent wall is in the details – from carefully selecting your materials to meticulously planning your batten spacing, every step counts in creating a unique and charming piece that reflects your personal style.
Don’t be afraid to experiment and make the project your own, whether that means choosing a bold paint color or adding decorative trim – after all, DIY is all about embracing your creativity and having fun with the process, just like I do with my trusty sidekicks, ‘Sawdy’ the saw and ‘Hammy’ the hammer.
Most importantly, enjoy the journey and don’t worry if things don’t turn out perfectly – it’s the imperfections and personal touches that will make your board and batten accent wall truly special, a one-of-a-kind reflection of your love for DIY and home renovation, just like the pieces I craft from vintage furniture in my own workshop.
Hammering Home Wisdom
A board and batten accent wall is more than just a design element – it’s a story of transformation, where every hammer strike and every carefully placed batten tells a tale of craftsmanship and love, turning a house into a home.
Terry Otero
Bringing it All Together: Your Board and Batten Accent Wall
As we’ve journeyed through the process of creating a board and batten accent wall, from the initial planning stages to the final touches, it’s essential to remember a few key elements. The width and spacing of your battens can dramatically alter the aesthetic of your wall, and choosing the right materials can make all the difference in achieving a polished, professional look. Don’t forget to name your trusty tools, like my beloved hammer, Bertha – it makes the experience even more personal and enjoyable. By following the steps outlined in our DIY Board and Batten Tutorial, you’ve not only learned a new skill but have also brought a touch of warmth and character to your home.
Now, as you step back to admire your handiwork, remember that the true beauty of DIY projects like this lies not just in the end result, but in the journey itself. The process of creating something with your own hands, of seeing a vision come to life, is incredibly empowering. So, don’t be afraid to experiment and try new things – every project is an opportunity to learn, to grow, and to make your home a reflection of your unique personality and style. With every swing of Bertha and every carefully placed batten, you’re not just building a wall, you’re building a story.
Frequently Asked Questions
What type of wood is best suited for a board and batten accent wall?
For a board and batten accent wall, I recommend using pine, spruce, or fir – they’re budget-friendly and take stain beautifully. My trusty tool, “Stainy” the stain brush, always seems to bring out the best in these woods. You can also consider cedar or cypress for a more rustic look, but keep in mind they can be pricier.
How do I ensure the battens are evenly spaced and aligned?
To ensure even spacing and alignment, I use my trusty level, Bertha, and a spacer made from a scrap piece of wood. I mark the wall with a pencil, then use Bertha to double-check everything is straight. My grandfather taught me to measure twice, hammer once – it’s a mantra that’s served me well over the years!
Can I use a board and batten accent wall in a small room without making it feel cramped?
Absolutely, my friend! I’ve worked with small rooms before, and with the right approach, a board and batten accent wall can actually make the space feel larger. Just remember, narrower battens and a lighter color palette can create a sense of airiness, while a single accent wall can draw the eye upwards, making the room feel more spacious. My trusty tape measure, ‘Mae’, always helps me get it just right!