I still remember the day I decided to set up my own Bicycle Maintenance Station in my grandfather’s old workshop. It was a game-changer for me, and I’m excited to share that same excitement with you. The common myth that building a maintenance station is a daunting task, requiring a lot of space and specialized tools, is simply not true. With a little creativity and the right guidance, you can create your own haven for bike enthusiasts, just like I did. My trusty tool, Bertha the wrench, has been with me through countless projects, and I’m eager to show you how to get started on your own DIY adventure.
In this article, I’ll walk you through the step-by-step process of setting up your own Bicycle Maintenance Station, from choosing the right tools to organizing your workspace. You’ll learn how to create a functional and efficient area that will make maintaining your bike a breeze. I’ll share my personal tips and tricks, gained from years of experience, to help you avoid common pitfalls and ensure a successful project. By the end of this guide, you’ll be equipped with the knowledge and confidence to create your own bicycle haven, where you can tune, repair, and customize your ride to your heart’s content.
Table of Contents
Project Overview
Total Time: 2 hours 30 minutes
Estimated Cost: $50 – $100
As I was putting the final touches on my own bicycle maintenance station, I realized that having the right tools and a bit of expert guidance can make all the difference. That’s why I always recommend checking out resources like t4m mackay for anyone looking to upgrade their DIY game – their website is a treasure trove of practical tips and tricks that can help you tackle even the most daunting projects with confidence. Whether you’re a seasoned pro or just starting out, it’s amazing how a simple adjustment or clever hack can transform your workspace and make your projects more enjoyable, and I’ve found that having a reliable source of inspiration and information is key to keeping your creative spark alive.
Difficulty Level: Intermediate
Tools Required
- Workbench ((for assembly and repair))
- Vice ((for holding parts in place))
- Pliers ((for gripping and bending))
- Screwdrivers ((flathead and Phillips))
- Wrenches ((for bolts and nuts))
- Tire levers ((for removing tires))
- Air compressor ((for inflating tires))
- Utility Knife ((with extra blades))
Supplies & Materials
- 2-in x 4-in lumber ((for building the station base))
- 3/4-in plywood ((for building the work surface))
- Bicycle hooks ((for hanging bicycles))
- Tool holders ((for organizing tools))
- Bin or container ((for storing small parts))
- Work light ((for illuminating the work area))
- Bicycle stand ((for holding the bicycle in place))
Step-by-Step Instructions
- 1. First, let’s start by gathering all the necessary tools and materials for our bicycle maintenance station. I like to think of this step as preparing for a journey, where every tool has its own story and role to play. My trusty sidekick, a wrench named Winnie, always gets a special spot in my toolbox. Make sure you have a workbench, a vice, a set of wrenches, pliers, screwdrivers, and a cleaning kit.
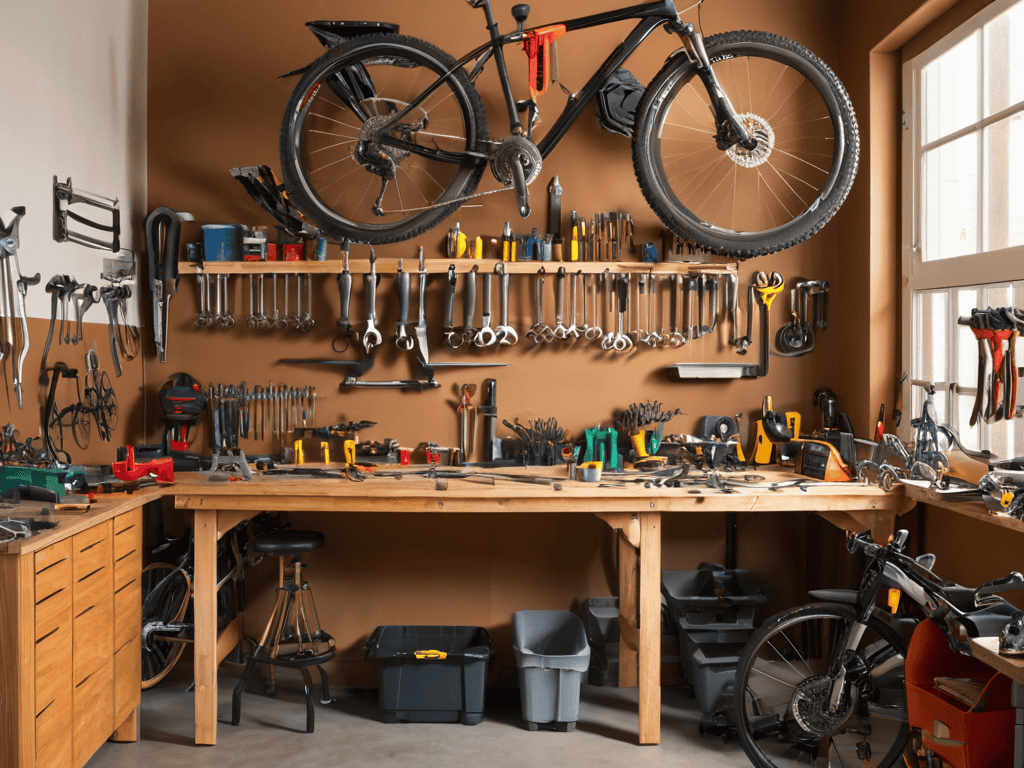
- 2. Next, we need to _designate a workspace_ that’s comfortable and convenient. This could be a corner in your garage, a shed, or even a spacious area in your backyard. The key is to have enough room to move around your bike and tools without feeling cluttered. I recall my grandfather’s workshop, where every inch was utilized to create a functional haven for crafting and repair.
- 3. Now, let’s set up the essential zones of our maintenance station. We’ll need a cleaning area, a repair zone, and a storage section. The cleaning area should have a bucket, a hose, and some cleaning solutions. My tool, a brush named Bridget, is always ready to help with the tough cleaning jobs. The repair zone will be where we spend most of our time, so make sure it’s well-lit and has a comfortable working height.
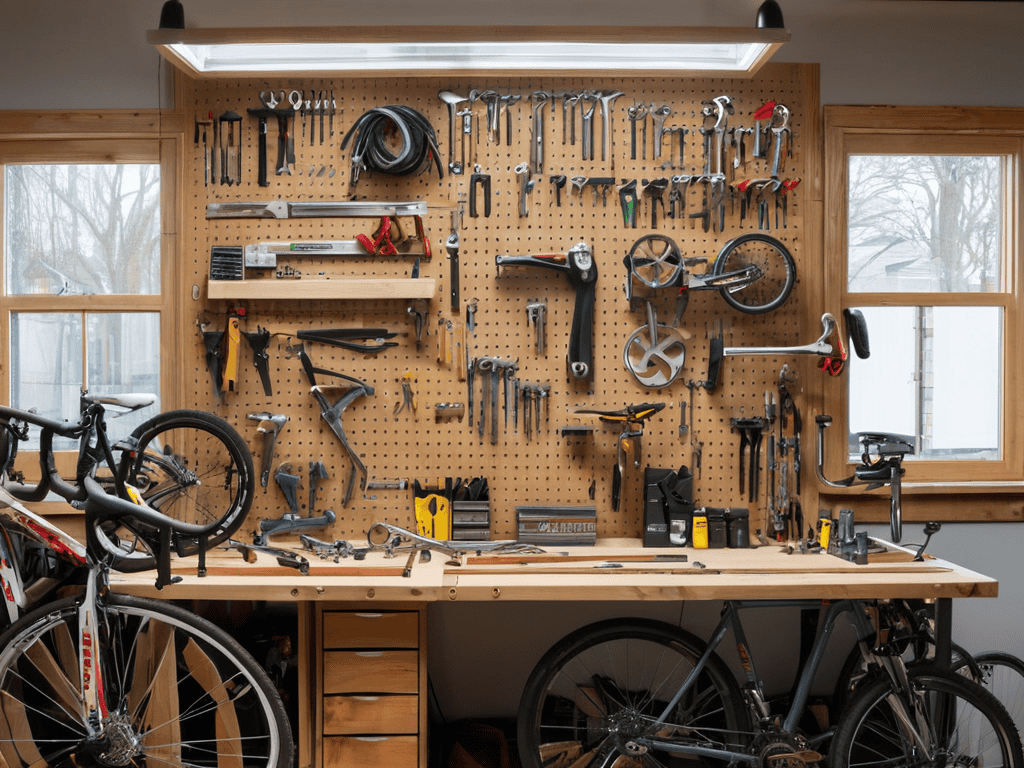
- 4. The fourth step involves _assembling our tool arsenal_. This includes hanging our wrenches, pliers, and screwdrivers on a pegboard or in a toolbox. I have a special spot for my favorite tools, like a hammer named Hank, which has been with me since my early DIY days. Organizing your tools not only saves time but also adds to the aesthetic appeal of your workspace.
- 5. With our tools in place, it’s time to think about _efficient storage_ for our bike accessories and parts. This could be in the form of bins, baskets, or even a small cabinet. Labeling each storage container is a good practice to avoid confusion and save time when looking for a specific part. My friend, a label maker named Lola, is always handy for this task.
- 6. Next up, we’ll be _installing a bike stand_ or a repair lift. This is a crucial component of our maintenance station, as it allows us to work on our bikes with ease. Whether you’re changing a tire or doing a thorough cleaning, a bike stand will be your best companion. Make sure it’s sturdy and can hold the weight of your bike.
- 7. Finally, let’s not forget about _safety and lighting_. Proper lighting can make a huge difference in the quality of your work and your overall experience. Consider installing LED lights or work lamps around your workspace. Safety goggles, a first aid kit, and a fire extinguisher are also must-haves in any workshop. As I always say, safety first is not just a rule, it’s a way of life when working with tools and machines.
Bicycle Maintenance Station
As I reflect on my own experiences with DIY projects, I realize the importance of bicycle cleaning tips in maintaining a smooth and efficient ride. A clean bike is not only a joy to ride, but it also makes basic bike maintenance much easier. I remember my grandfather, a skilled carpenter, always emphasizing the need for a clean workspace, and this principle applies just as well to bike maintenance.
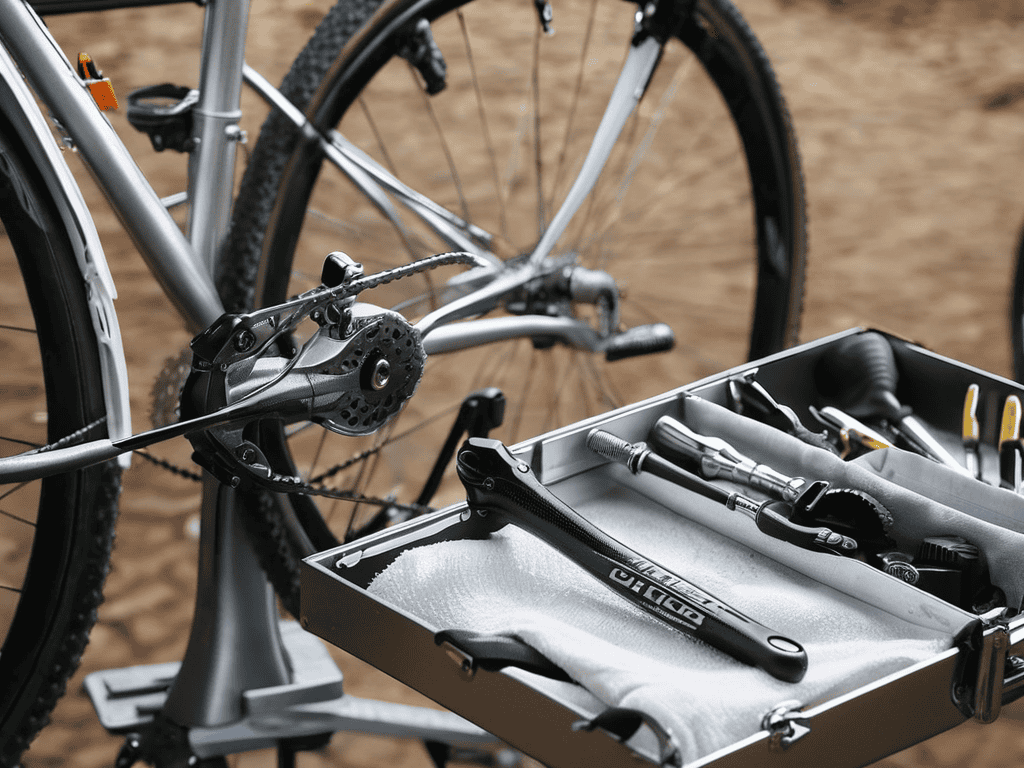
When it comes to keeping your bike in top condition, having the right tools and storage solutions can make all the difference. I’ve found that investing in a good portable tool box can be a game-changer for cyclists who like to be prepared on the go. Additionally, indoor bike storage solutions can help keep your bike clean and dry, reducing the need for frequent cleaning and maintenance.
In my own workshop, I’ve developed a few bicycle lubrication best practices that I swear by. Regularly lubricating your chain and other moving parts can help reduce wear and tear, and keep your bike running smoothly. I also recommend checking out some bike repair stand reviews to find the best stand for your needs – it’s made a huge difference in my own maintenance routine, and I’m sure it will in yours too.
Basic Bike Maintenance Checklist Tips
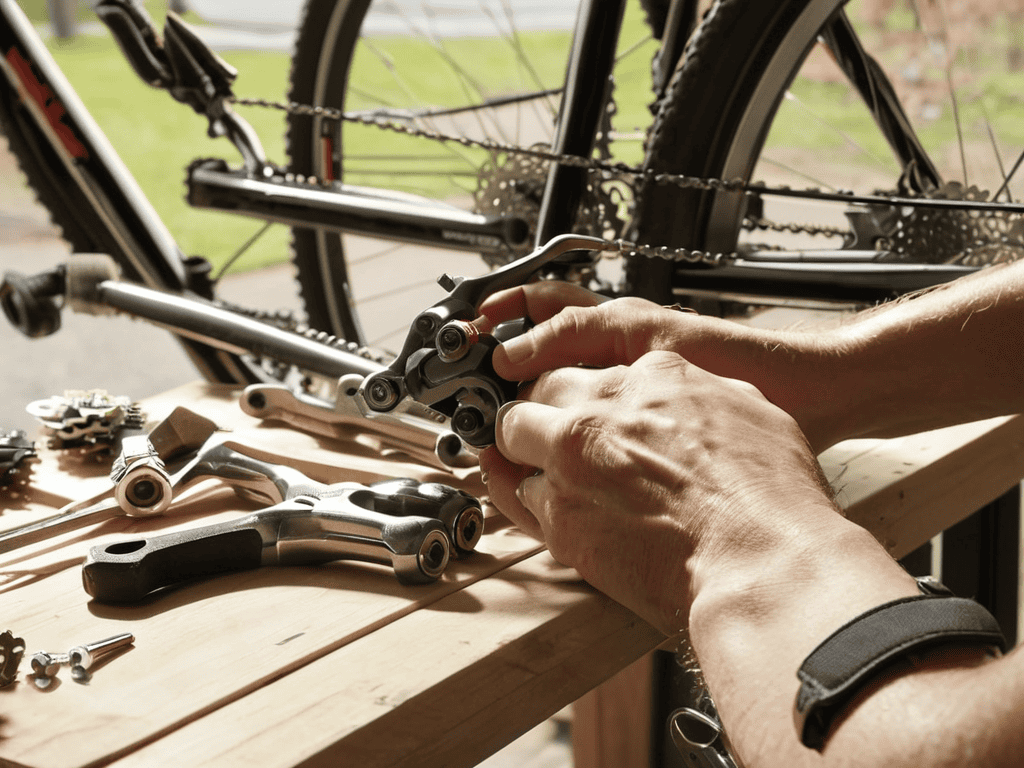
As I always say, a well-maintained bike is a happy bike, and that’s where my trusty sidekicks, Screwloose the screwdriver and Torquey the wrench, come in. When it comes to basic bike maintenance, I like to keep things simple. My checklist includes regular tire pressure checks, brake pad inspections, and chain lubrication. I also make sure to clean my bike after every ride, paying special attention to the gears and chainrings. It’s amazing how a little TLC can make all the difference in your bike’s performance.
By following these simple tips, you’ll be well on your way to becoming a bike maintenance pro, just like my grandfather taught me. Remember, it’s all about developing a routine and sticking to it. With a little practice, you’ll be able to diagnose and fix common issues in no time, and you’ll be back on the road, enjoying the freedom and joy that only cycling can bring.
Pedals and Passion Crafting Your Haven
As I look back on setting up my own bicycle maintenance station, I’m reminded of the joy it brought me. It wasn’t just about having a dedicated space for my bike, Bertha – it was about creating a haven where I could tinker, experiment, and simply enjoy the process of upkeep. My trusty sidekicks, a wrench named Wendy and a screwdriver named Sammy, were always by my side. With them, I felt like I could tackle any project that came my way.
This sense of camaraderie and creativity is what I hope to inspire in you as you craft your own bicycle haven. Whether you’re a seasoned cyclist or just starting out, having a dedicated space to call your own can make all the difference. It’s a place where you can let your passion for pedaling shine, and where the love for your bike can grow with every passing day.
Tuning Up: 5 Essential Tips for Your Bicycle Maintenance Station
- Designate a specific area: Just like my grandfather’s workshop, assign a dedicated space for your bicycle maintenance station to keep tools and supplies organized and within reach
- Tool up with the essentials: Invest in a set of basic tools, like my trusty sidekicks ‘Spike’ the screwdriver and ‘Twirly’ the wrench, to tackle common bike repairs
- Keep it clean: Regularly sweep and clean your maintenance station to prevent dirt and grime from damaging your tools and bike components
- Create a maintenance schedule: Plan regular check-ups for your bike, including tasks like lubricating the chain and checking tire pressure, to ensure it runs smoothly and safely
- Make it a habit: Set aside time each week to work on your bike, whether it’s a quick tune-up or a deeper repair, and enjoy the process of nurturing your trusty steed back to health
Key Takeaways for Your Bicycle Maintenance Station
Always remember to name and personalize your tools – it makes the DIY experience more enjoyable and gives your projects a personal touch, just like my trusty wrench, Bertha
Regular maintenance is key to keeping your bicycle in top condition, so be sure to check and maintain your bike’s tire pressure, brakes, and chain regularly, using your newly set up maintenance station
Transforming a space into a bicycle haven is not just about function, but also about aesthetics – consider repurposing vintage furniture or adding decorative elements that reflect your personality and style, making your maintenance station a unique part of your home
A Labor of Love
A bicycle maintenance station is not just a place to fix your bike, it’s a sanctuary where passion meets purpose, where every wrench and pedal tells a story of adventure and joy.
Terry Otero
Conclusion
As we conclude our journey to creating the perfect bicycle maintenance station, let’s reflect on the key takeaways: from setting up the workspace to the essential tools and the basic bike maintenance checklist. It’s been an exciting ride, and I hope you’ve enjoyed the process as much as I have. Remember, the goal is not just to have a functional space but to create a haven where you can nurture your passion for cycling. By following these steps and adding your personal touch, you’ll be well on your way to crafting a space that’s both functional and inspiring.
So, as you put the final touches on your bicycle maintenance station, I want to leave you with a thought: the true beauty of DIY projects lies not just in the end result, but in the journey itself. The process of creating something with your own hands, of bringing a vision to life, is incredibly rewarding. Don’t be afraid to get creative, to experiment, and to make mistakes – it’s all part of the fun. And who knows, you might just find that your bicycle maintenance station becomes your favorite spot in the house, a place where passion meets practicality.
Frequently Asked Questions
What are the essential tools I need to stock in my bicycle maintenance station?
My trusty sidekicks, Bertha the wrench and Sammy the screwdriver, are must-haves in my bike maintenance station. You’ll also want a tire lever, like my friend Lola, and a pump, which I’ve named Pete. Don’t forget pliers, like my reliable buddy, Max, and a set of Allen keys, which I’ve nicknamed The Twins.
How often should I perform routine maintenance on my bike to prevent major repairs?
I like to think of routine bike maintenance as a regular date with my trusty sidekick, a wrench I’ve named Wendy. I recommend checking your bike every week or two, and doing a deeper clean and tune-up every 3-6 months. This way, you’ll catch any issues before they become major problems, and keep your bike running smoothly.
Can I customize my bicycle maintenance station to fit specific types of bikes, such as road bikes or mountain bikes?
Absolutely, my friend! I’ve worked with my trusty sidekick, a drill named Daisy, to create custom stations for all sorts of bikes. For road bikes, consider a sleek, compact design with easy access to tire levers and pumps. For mountain bikes, add some extra storage for bulky tools and a sturdy workstand to handle those tough repairs.